Cursor Integration
Route Cursor IDE requests through LiteLLM for unified logging, budget controls, and access to any model.
Supported modes: Ask, Plan. Agent mode doesn't support custom API keys yet.
Quick Reference
| Setting | Value |
|---|---|
| Base URL | <LITELLM_PROXY_BASE_URL>/cursor |
| API Key | Your LiteLLM Virtual Key |
| Model | Public Model Name from LiteLLM |
Setup
1. Configure Base URL
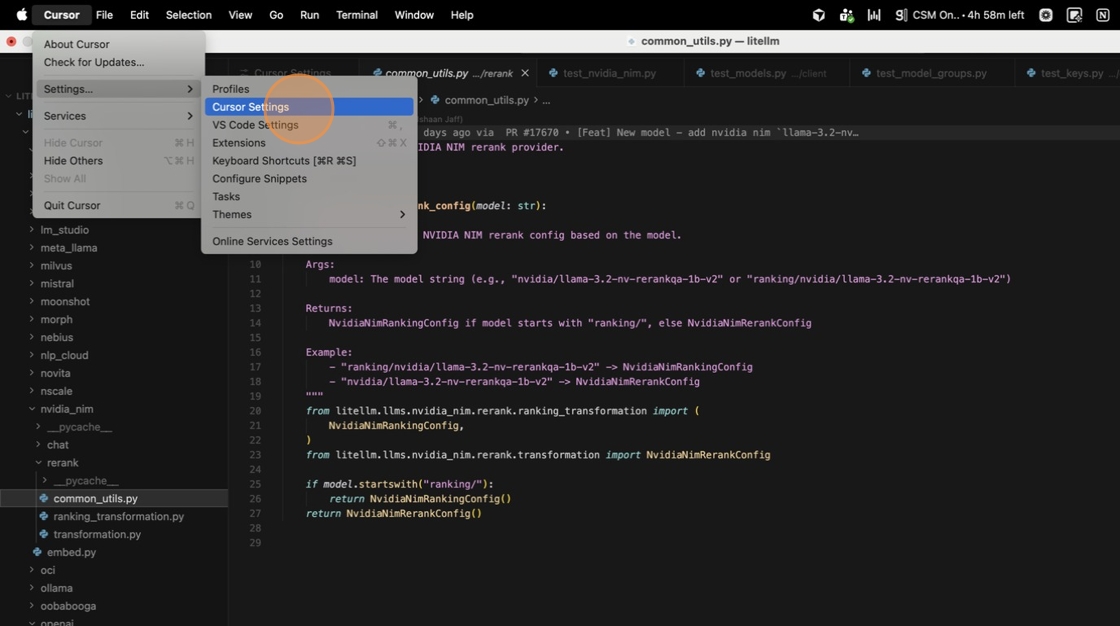
Open Cursor → Settings → Cursor Settings → Models.
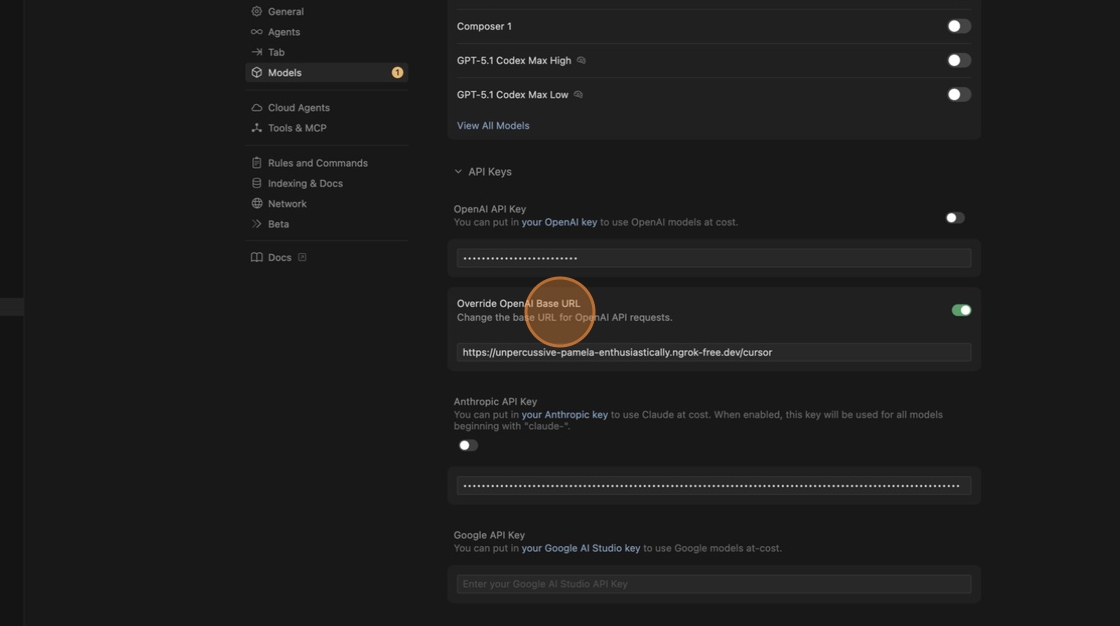
Enable Override OpenAI Base URL and enter your proxy URL with /cursor:
https://your-litellm-proxy.com/cursor

2. Create Virtual Key
In LiteLLM Dashboard, go to Virtual Keys → + Create New Key.

Name your key and select which models it can access.

Click Create Key then copy it immediately—you won't see it again.
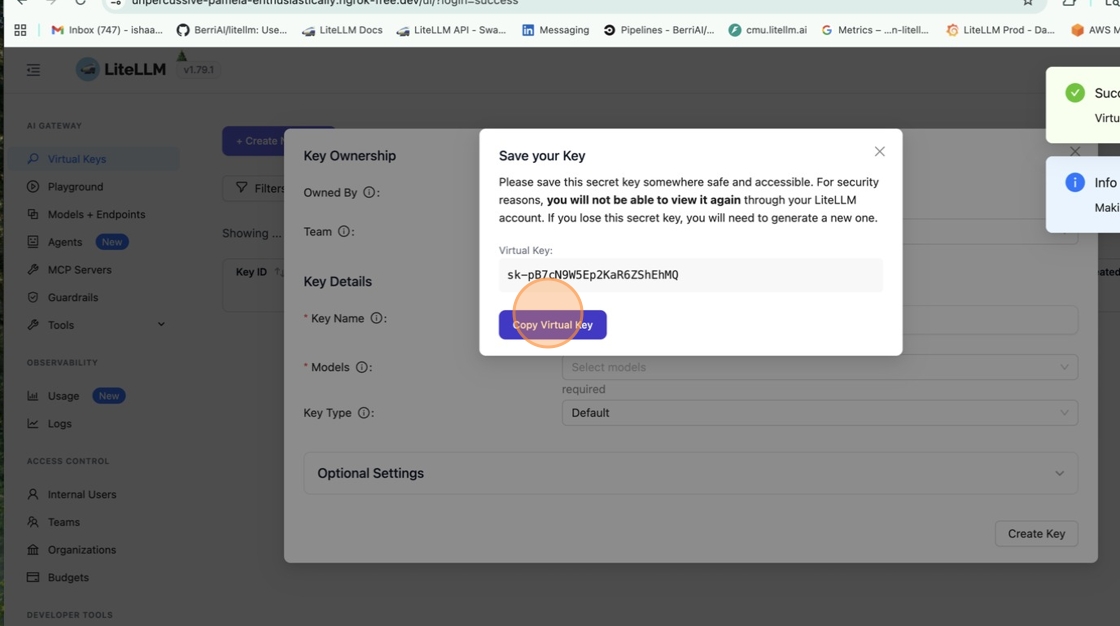
Paste it into the OpenAI API Key field in Cursor.
3. Add Custom Model
Click + Add Custom Model in Cursor Settings.
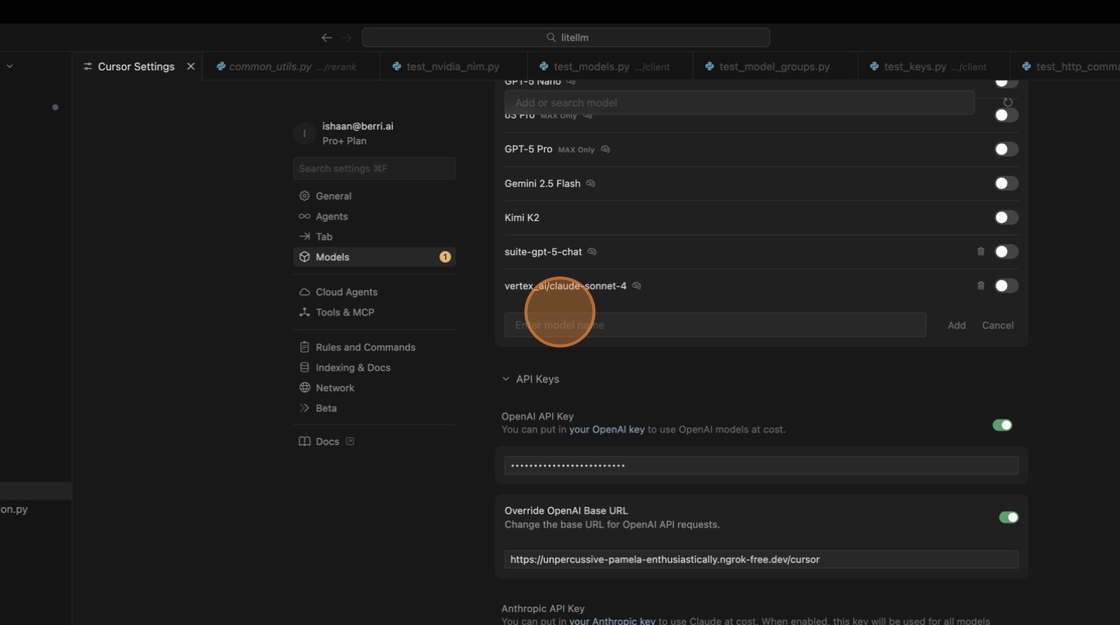
Get the Public Model Name from LiteLLM Dashboard → Models + Endpoints.
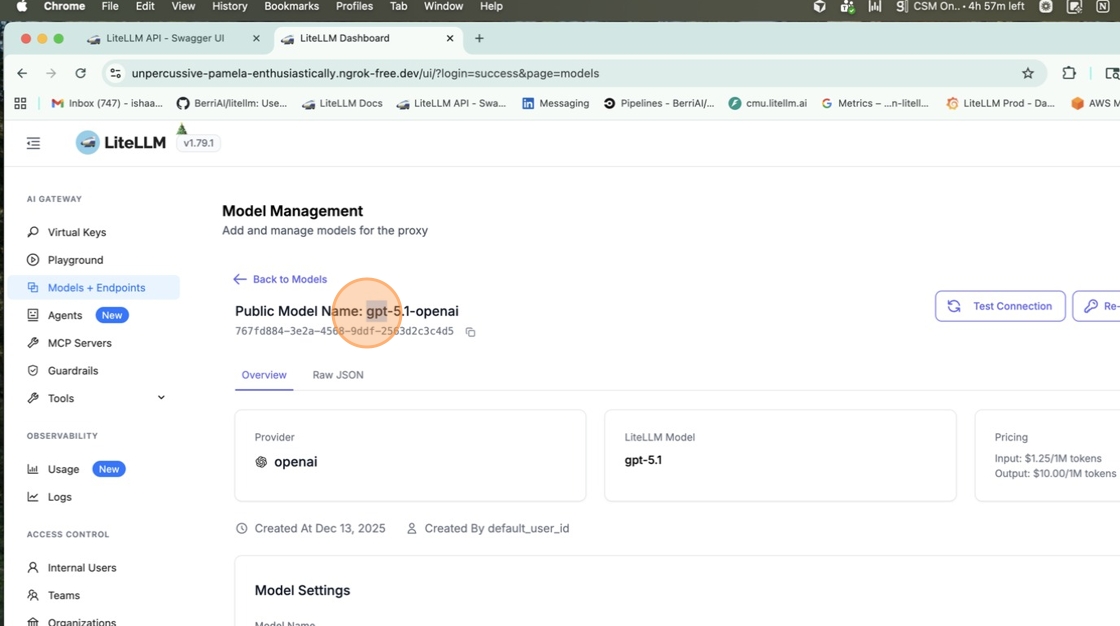
Paste the name in Cursor and enable the toggle.

4. Test
Open Ask mode with Cmd+L / Ctrl+L and select your model.

Send a message. All requests now route through LiteLLM.

Connecting MCP Servers
You can also connect MCP servers to Cursor via LiteLLM Proxy.
For official instructions on configuring MCP integration with Cursor, please refer to the Cursor documentation here: https://cursor.com/en-US/docs/context/mcp.
-
In Cursor Settings, go to the "Tools & MCP" tab and click "New MCP Server".
-
In your
mcp.json, add the following configuration:
{
  "mcpServers": {
    "litellm": {
      "url": "http://localhost:4000/everything/mcp",
      "type": "http",
      "headers": {
        "Authorization": "Bearer sk-LITELLM_VIRTUAL_KEY"
      }
    }
  }
}
- LiteLLM's MCP will now appear under "Installed MCP Servers" in Cursor.

Troubleshooting
| Issue | Solution |
|---|---|
| Model not responding | Check base URL ends with /cursor and key has model access |
| Auth errors | Regenerate key; ensure it starts with sk- |
| Agent mode not working | Expected—only Ask and Plan modes support custom keys |